


|
Doing your own page layout can save you hundreds of dollars!Page layout can be accomplished in Microsoft Word. More expensive pro-grams, such as Quark Express and Adobe InDesign, will do a more professional job, especially when color or lots of graphics are involved, but Microsoft Word will do an adequate job, and is particularly appropriate when you are publishing a "print on demand" book.
Furthermore, if you master book design and page layout with Microsoft Word, you can save hundreds of dollars in production costs when self-publishing your books. It really is worth your time and effort to learn the basic skills of self-publishing. Getting StartedIf your manuscript is still double spaced, now is the time to change it to single space. If you have been formatting as you go along, rather than using styles, it might be a good idea to clear all formatting before we begin. One way to do this on the "Home Tab" is to click on the down arrow in the Styles group, and then click on "Clear All" at the top of the Styles pane. If you have used bold, italics, underline, etc. extensively, you may wish to wait and just double check your formatting when you are finished.
Microsoft Word is fully capable of keeping your entire book in one file. Section breaks, a powerful page layout feature, allow you to format different parts of the book differently, so there is no advantage to separate files. Having you book in one file simplifies making a table of contents and an index, if you need one. One exception would be if you use extensive graphics; you may want keep them in separate files and link them to placeholders in your files. Check with your publisher first. Page SetupOnce again, I will use a 6 X 9 paper based book for my examples. Begin by clicking on the "Page Layout" tab. Click on down arrow in the page setup group to call up the page setup dialog box.
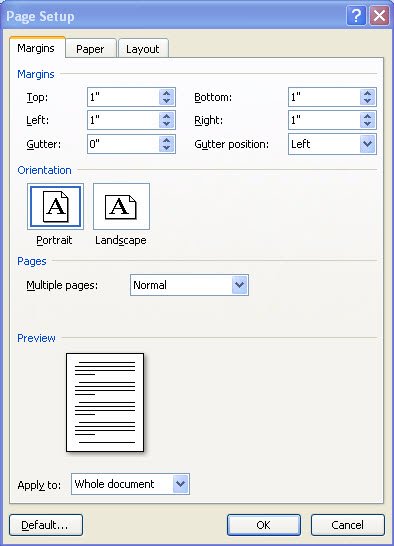
Drop down to where it says Multiple Pages on the Margin tab. Click on the drop down menu and select "Mirror Margins." This will allow us to make the inside margins larger to compensate for the area taken up by the book's binding. Return to the Margins area. "Left" and "Right" will have been replaced by "Inside" and "Outside." Select a 0.5 inch margin for the top, outside, and bottom margins. This is the minimum allowed. Why would you want to use the minimum margins allowed? One reason would be to reduce the number of pages, thereby reducing printing costs. Select 0.7 inches for the inside margin. Select "Whole document" in the Apply to window. Click on the Paper tab. 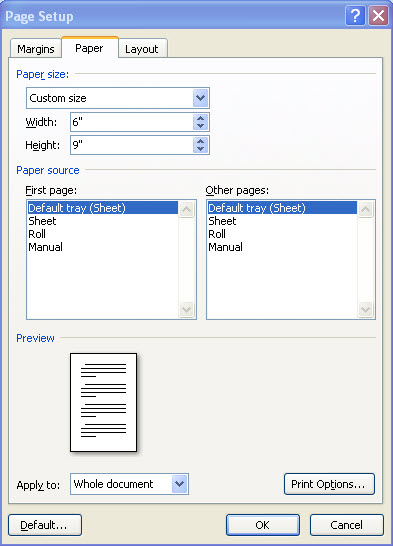
Type a "6" in the Width box and a "9" in the Height box. Select "Whole document" in the Apply to window. Click on the Layout tab.

It you are writing nonfiction, such as a "how to" or a technical book, each chapter should start on a right hand page, so it would be more convenient to have your section breaks begin on an odd page. Under Headers and Footers, check different odd and even. This facilitates putting the book title on the even page and the chapter name or number on the Odd page. It also enables you to put the page numbers on the outside of both left and right pages. Under Headers and Footers, check different first page. This is because so often we want to format the first page different than the rest of a section. Select "Top" for vertical alignment so that the tops of left and right pages are even with each other. Apply to "Whole document." Close the Page Setup dialog box. If you are going to use the traditional "full justification," click on hyphenation in the Page Setup group, and select "Automatic." Click on "Hyphenation Options," Set the "Hyphenation zone" to 0.5 and limit consecutive hyphens to 2. I highly recommend Perfect Pages by Aaron Shepard. I believe it is the best book available for self-publishing a book with Microsoft Word. Get access to FREE book publishing tools, resources, and a growing online community of authors. Learn how.
|
